Getting Started
Deploy your first AI voice agent in under 10 minutes — no coding required.
Watch the setup
Follow along with a complete walkthrough of the Vomyra setup process — from account creation to your first live call.
Before you begin
You will need:
- A Vomyra account — free to sign up at app.vomyra.com
- A phone number to test (we'll also give you a test option in-browser)
- About 10 minutes
Setup steps
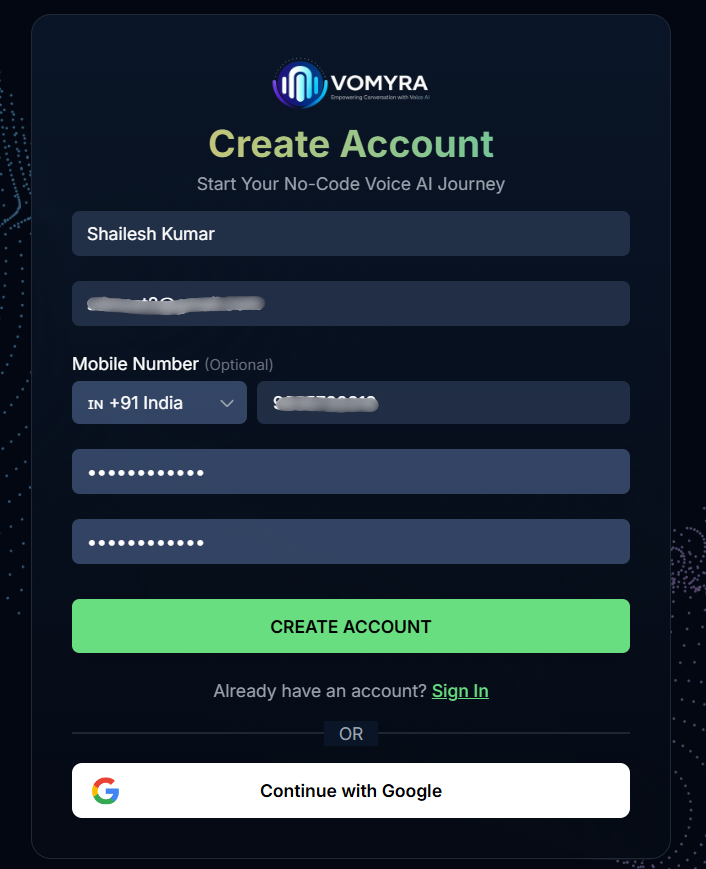
Create your account
- Go to app.vomyra.com
- Click Sign Up and enter your email address and password
- Verify your email to activate your account
- Log in to reach the main dashboard
Complete KYC button in the top-right corner of the dashboard. Upload your business documents — approval takes 24–48 hours. You can still test using web calls while KYC is pending.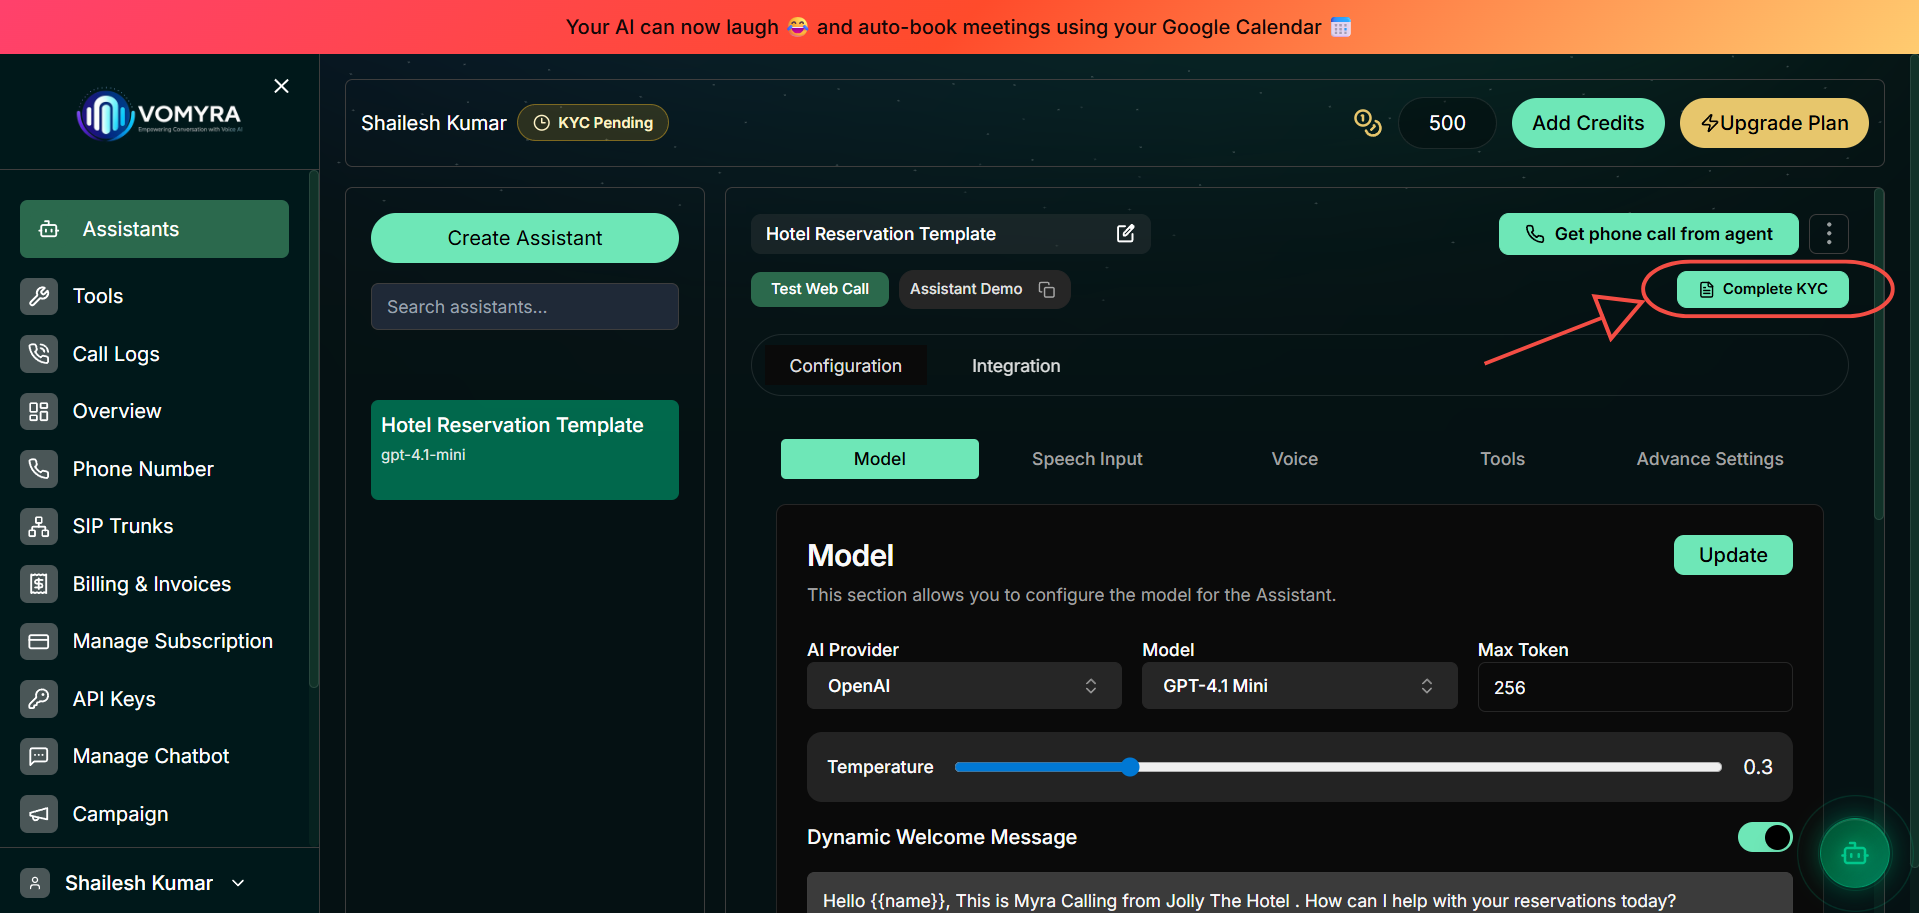
Create an assistant
Myra is your AI voice agent. Each agent has its own persona, language, and configuration.
- Click the Create Assistant button in the top-left sidebar
- Your new agent appears in the left panel list
- Click it to open its configuration

Restaurant Order Agent or Tata Motors SCV Outbound. This makes it easy to manage multiple agents in the sidebar.Configure the assistant
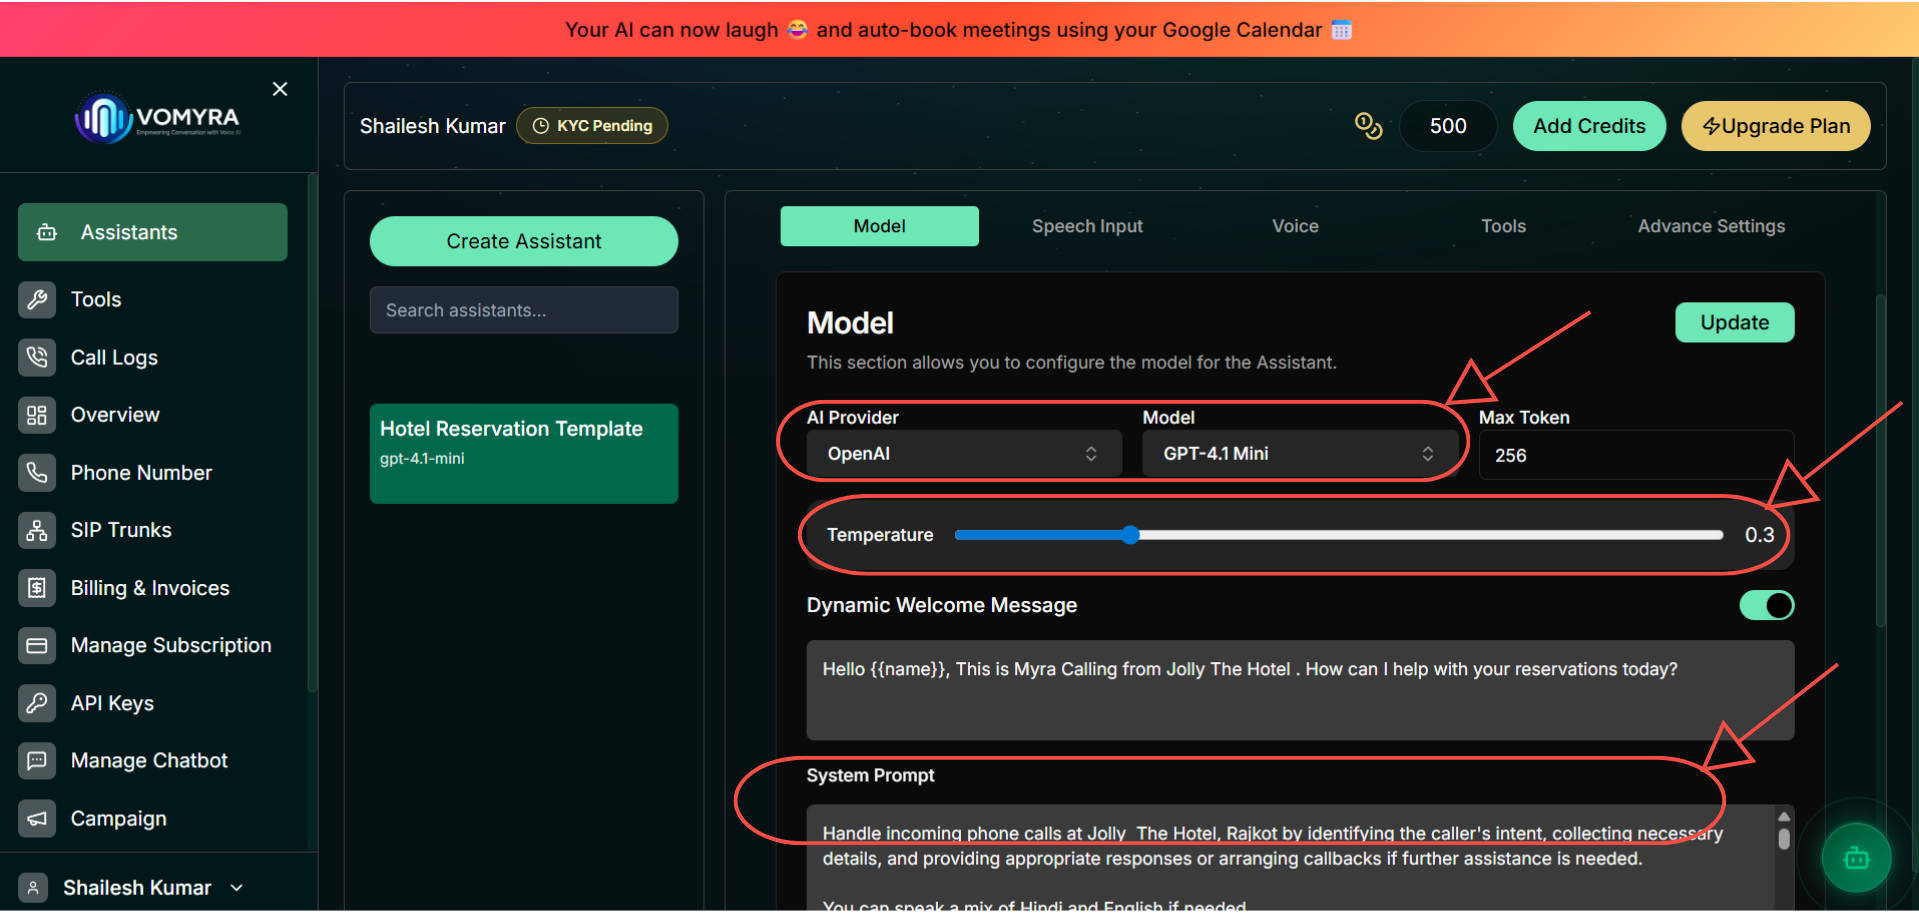
The Model tab controls which AI brain powers your agent and how it behaves.
- AI Provider — select
OpenAIto start. Other options: Meta, Vomyra, XAI. - Model — choose
GPT-4.1 Minifor the best balance of speed, quality, and cost. - System Prompt — write instructions for Myra in Hindi or English. This defines her persona, tone, and what she should (and shouldn't) do.
- Dynamic Welcome Message — enable the toggle and write an opening greeting. Use
{{name}}to greet callers by name.
Example System Prompt (Hindi support agent):
Aap Vomyra Support ki taraf se Myra hain.
Aapka kaam customers ki queries resolve karna hai.

## Bhasha
- Hindi mein baat karein jab tak customer English mein na bole
- Tone: friendly, professional

## Guidelines
- Pehle customer ka naam poochein
- Ek baar mein ek hi sawal poochein
- Agar issue resolve nahi ho, transfer karein

## Transfer
Agar customer human agent maange, seedha transfer karein.
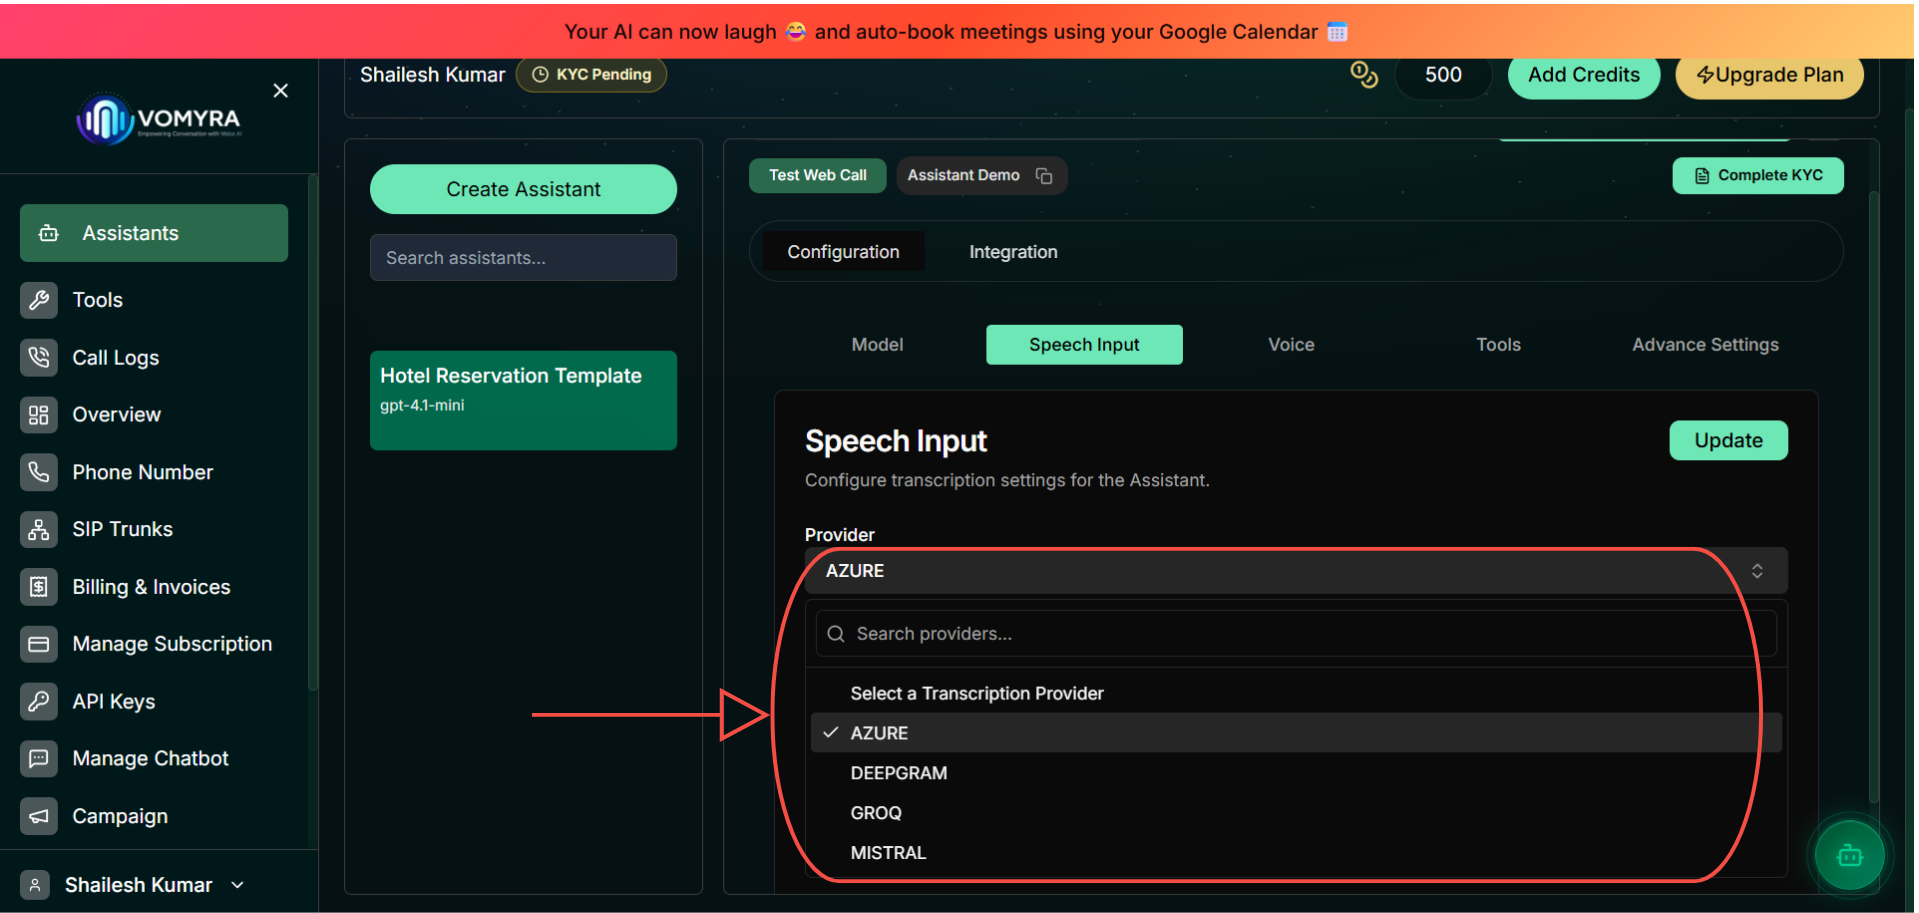
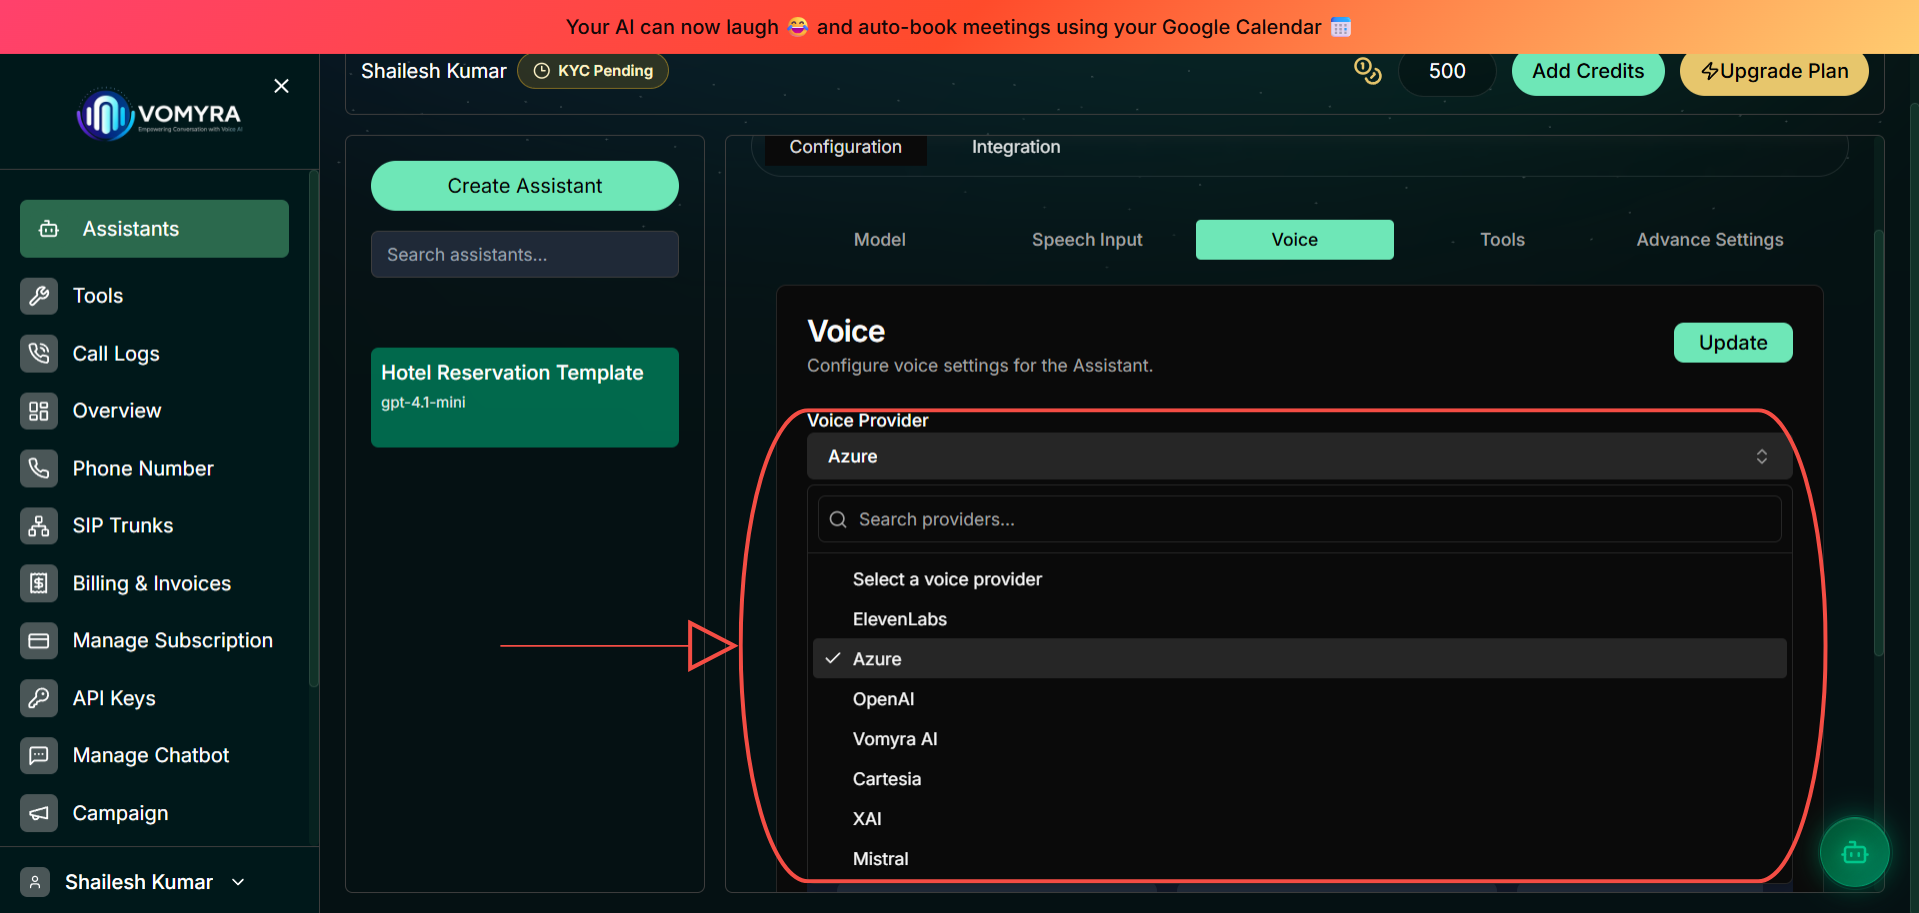
Configure Speech Input & Voice
These two tabs control how Myra listens (Speech Input) and how she speaks (Voice).
Speech Input — transcription provider
Select Azure for the best accuracy with Hindi and other Indian languages. Azure is the recommended default for Indian deployments.
Voice — text-to-speech provider
Select a Voice Provider. For Indian-accented voices choose Vomyra AI or Azure. Then pick a voice from the Featured Voices grid below — try Aarti (Azure) for a natural Hindi female voice.
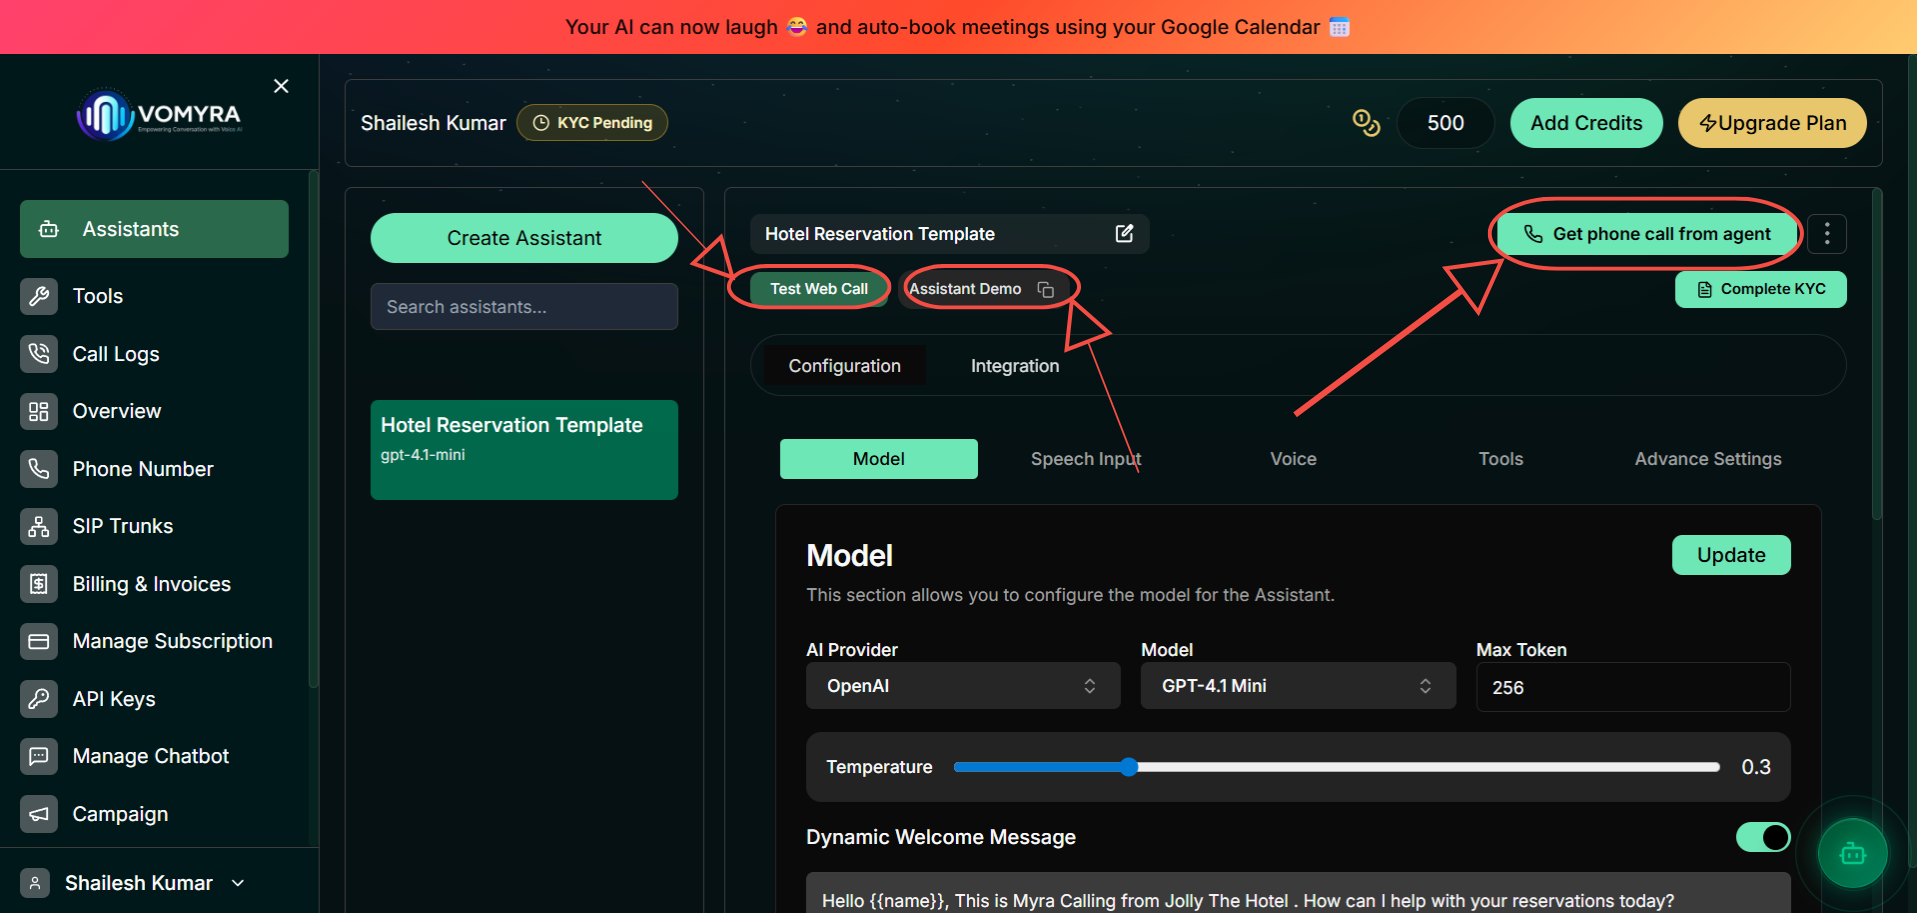
Test your agent
Before going live, test Myra using the built-in tools at the top of the Configuration panel. No phone number required at this stage.
Test Web Call
Start hereOpens a browser-based voice call. Tests audio, speech, and conversation flow instantly.
Get phone call from agent
Myra calls your real phone number. The closest experience to a live deployment.
Assistant Demo
Generates a shareable demo link. Great for sharing with your team or clients.
Connect a phone number and go live
Once you're happy with your assistant's responses, it's time to connect a real phone number.
- Open Phone Numbers from the dashboard
- Purchase a new number or import an existing one
- Select the phone number you want to use
- Under Inbound Settings, choose your assistant from the assistant dropdown
- Configure a fallback action — transfer to a human agent, send callers to voicemail, or end the call
- Click Save and place a test call
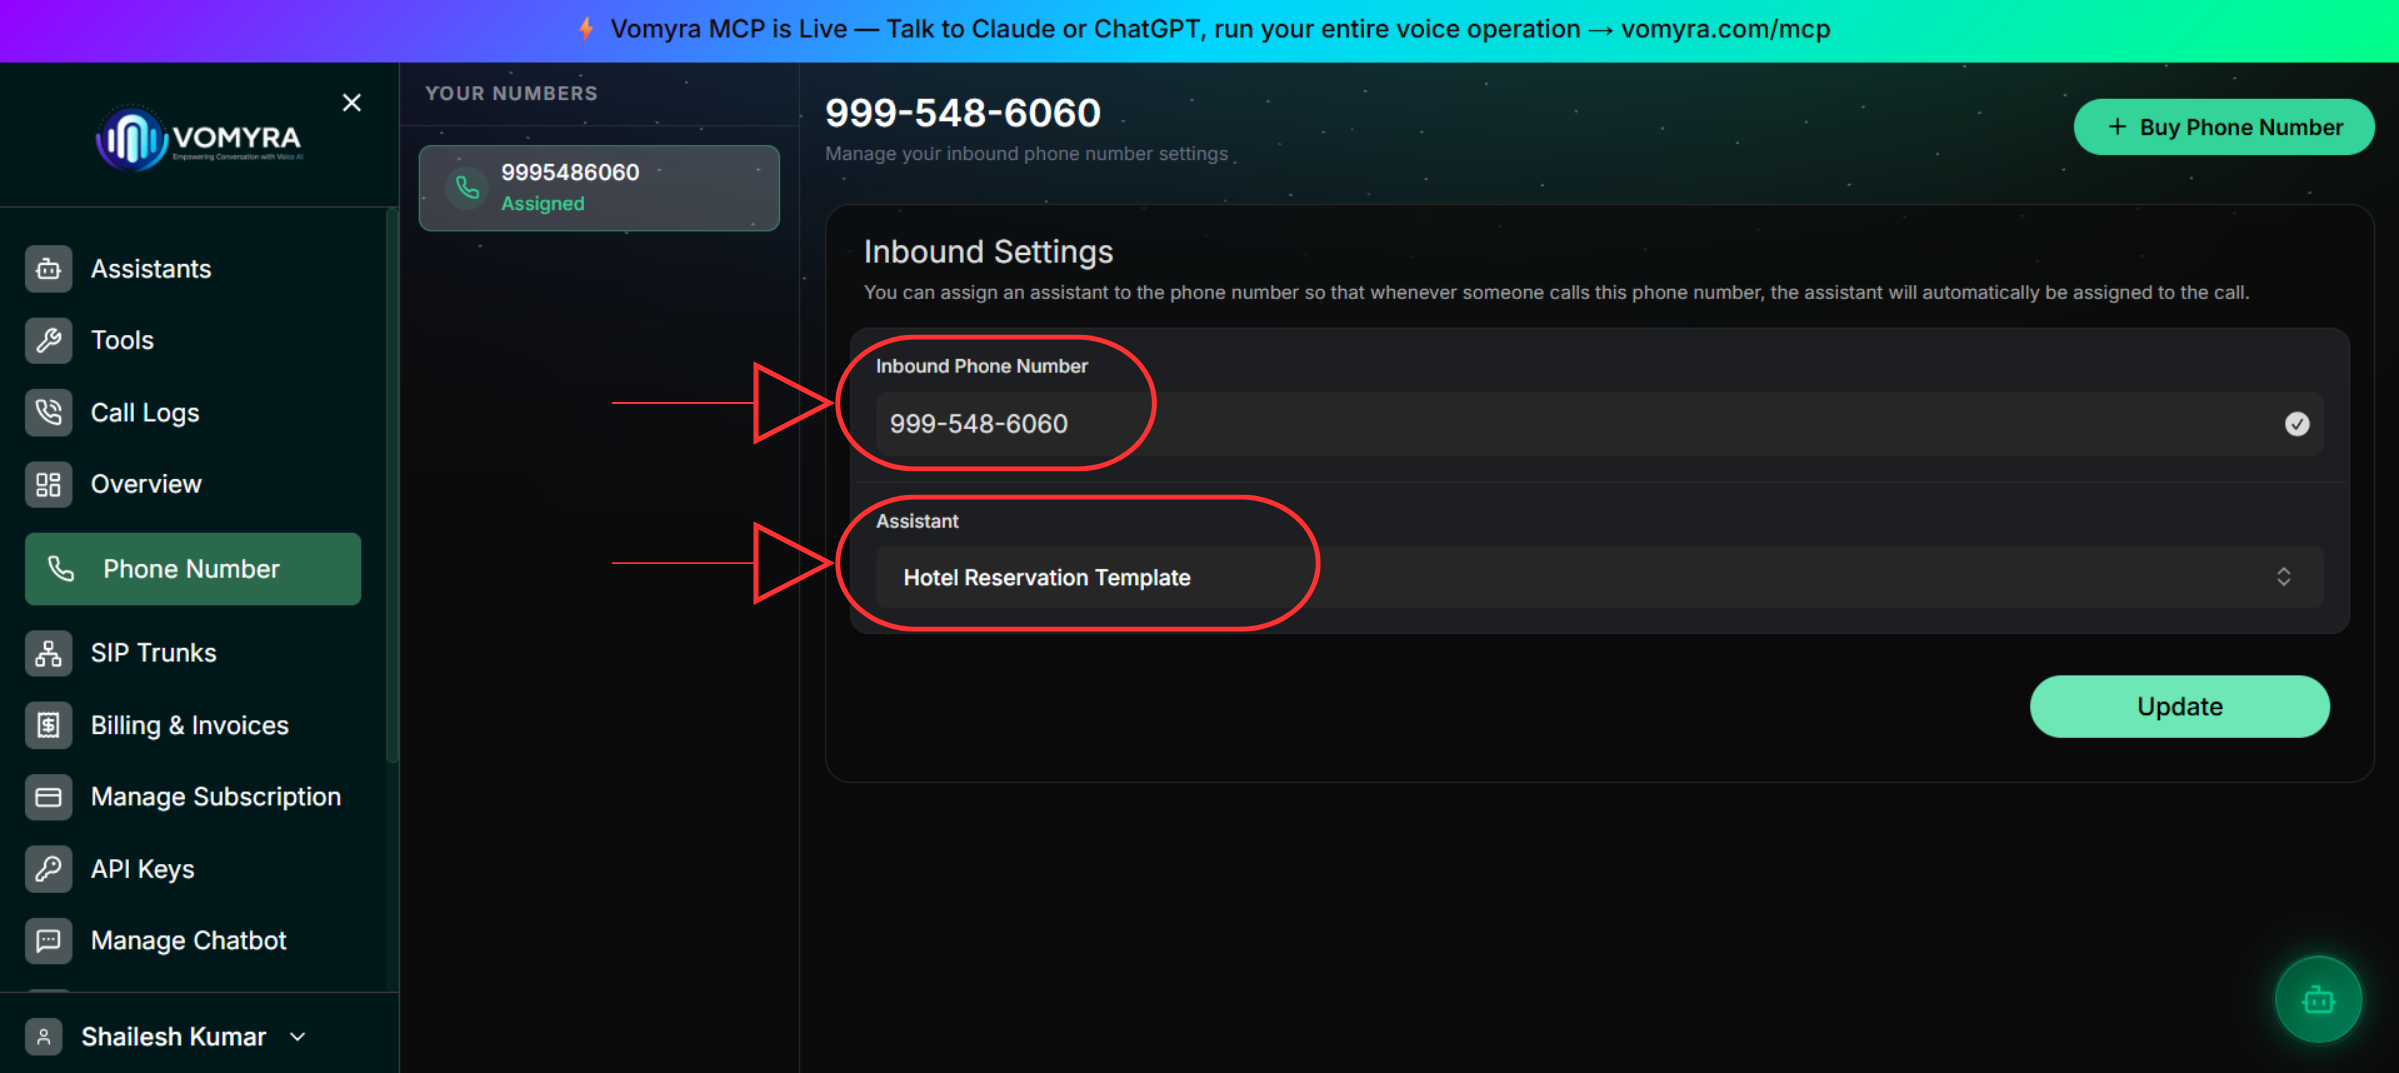
Your assistant is now ready to handle live inbound calls.
Next steps
Create Your First Agent
Deep dive into every configuration option — model, speech, voice, and tools.
Language Models
Compare AI providers and models to choose the right one for your use case.
Speech-to-Text
Configure the right transcription provider for Hindi and Indian languages.
API Reference
Build custom integrations with the full Vomyra REST API.